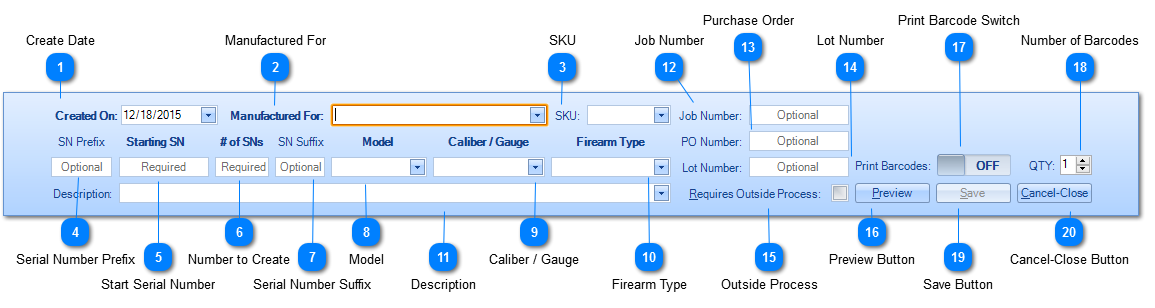
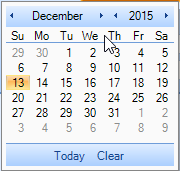
Create Date defaults to the current date when the module is opened and after each acquisition. Type in or use the Calendar control to select the correct Create Date.
In the example we are going to select Dec. 1, 2015 as the Created On date.
This drop down works the same as vendor selection in FFL Tools Acquire. If the item(s) are being manufactured for an FFL that is not in the drop down, select <New> to display
dialog.
In the Add New Vendor dialog, the FFL field will have focus. Type in the complete FFL number and then click to perform an FFL eZCheck. The FFL's information will be returned from the FFL eZCheck system.
Click to save the new Vendor. Unless there is a variance in place that allows for the user of FFL Tools Complex Manufacturing to manufacture for another FFL holder, the Manufactured For would be your FFL information.
In the example we are going to Select Lewis Tactical as the Manufactured For.
In the manufacturing process, SKU is a very important element. If you create a new SKU for each firearm design that you manufacture, the next time you manufacture that design, the SKU field can be selected and Model, Caliber/Gauge, Firearm Type, and Description will be auto filled.
In the example we are going to create a new SKU: LT1911C
Serial Number Prefix allows for any non-repeating alpha numeric character. It should start with a letter or number and can contain most of the special characters except the single and double quotes. Example LT-
The Start Serial number is the first sequential serial number that is to be created. This section will only accept numbers. The number can have leading zeros and each number generated will be padded with the correct number of zeros. As an example if you type: 001 for the start serial number and then generate 100 serial numbers the first one would be 001, the tenth one would be 010, the hundredth one would be 100.
The Model is a drop down that allows for new entries. If you are creating a new SKU or decided not to use SKUs then you can use the drop down to select a Model that has been previously recorded. If it is a new Model it can be typed. Once items have been saved using the new Model, that Model will be in the drop down for future Creation Manufacturing Acquisitions.
The Firearm Type is the only drop down that does not allow for new entries. The drop down is pre-filled with ATF defined values. As you type the drop down will be displayed and the list narrowed.
The Description is optional. The drop down works the same as Model and Caliber / Gauge drop downs as you can select an existing value or add a new value if needed.
In the example Description will be Lewis Tactical 1911 Compact, 4" Barrel, Blue w/Rosewood Grips
Job Number is optional and provides a method to group items created on a specified job. You can create 100 serial number of one model and complete the acquisition and then create 20 items of a different model and assign the same Job Number. These two different Creation Acquisitions can then be disposed as a group.
Purchase Order and Lot Number operate the same way.
Purchase Order Number can be used to group multiple Creation Acquisitions together in the same manner as Job Number. This can be helpful for the FFL that has a variance that allows the FFL to manufacture on behalf of another FFL.
In the example Purchase Order is going to be left blank.
Lot Number is another method to keep track of manufacturing operations. Using a combination of Job Number, Purchase Order, and Lot Number provides quicker ways to dispose items by these numbers. They can also be used to filter items in the Inquiry screen.
In the example Lot Number will be 101
For the disposition example we will also create a second Creation Acquisition that will use the same Job Number, but a different Lot Number.
If Outside Processes are enabled in Manufacturing Store Options, then this check box will be on the screen. Check the box if the item(s) being manufactured will need to go to an outside processor. If so, then you will be able to dispose to and receive the items from a defined Outside Processor.
In this example we are leaving Requires Outside Process un-checked. In the second Creation Acquisition the Requires Outside Process will be check as to show how to Send and Receive items to and from an Outside Processor.
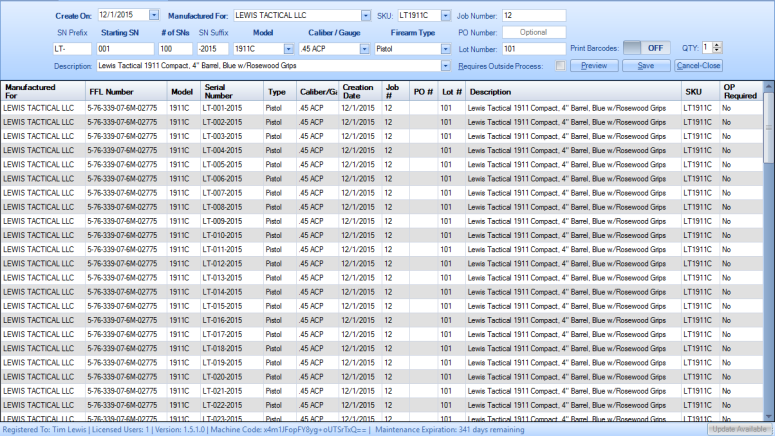
Once all required and optional information has been entered, press the Preview button to temporarily build and display the items in the grid. Items will not be permanently added to the database until the Save button is pressed. After clicking Preview, the Save button is enabled. Here is what the screen will look like using the example defined:
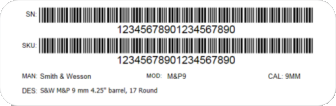
If you have a DYMO printer connected to your computer and you have configured a label for the Creation Acquisition Module, Then the Print Barcode Switch will be visible. If you want to print a barcode label for each Item being created, Click OFF to turn the switch ON. Below are the labels that have been predefined for Manufacturing.
Once everything is defined correctly, click Save to permanently add the records into your Manufacturing bound book. If DYMO printing is on, and you are creating a large number of items, it may take some time to finish processing. We have tested creating a large number of items, and you should limit each creation to 2500 records at a time to keep from overwhelming your computer.

 dialog.