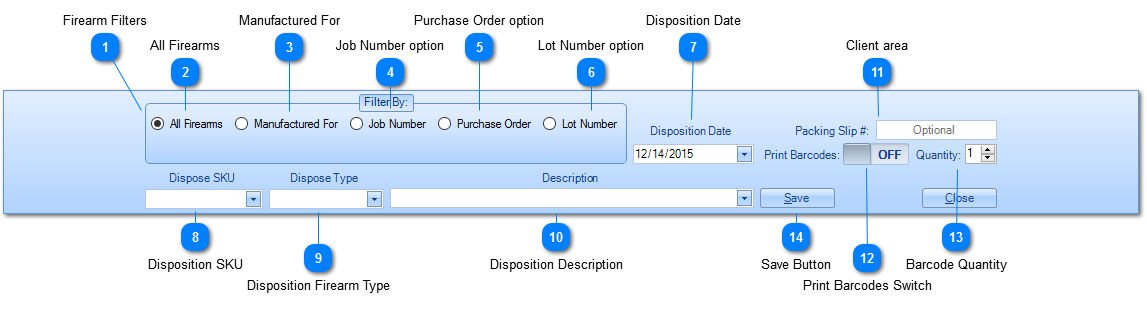
The Filter By radio buttons will filter the list of available firearms to be disposed. Manufactured For, Job Number, Purchase Order, and Lot Number if selected will display a drop down allowing for a value to be selected. When a selection is made in the drop down, the data grid below is refreshed showing only the items that meet the selection.
When Manufactured For radio button is selected, a drop down will be displayed allowing for an FFL to be selected. Once and FFL is selected, only firearms for that FFL will be displayed in the data grid.
Job Number radio button works the same way as Manufactured For, except the drop down will have a list of Job Numbers. Only firearms for the selected Job Number will be displayed in the data grid.
Complex Manufacturing allows for the Disposition SKU to be changed from the Acquisition SKU. This provides the flexibility to alter items during the manufacturing process. As and example you manufacture 50 1911 frames and acquire them with a SKU of 1911-FRAME. You then take 10 of these frames off the shelf and build a custom 1911 Pistol with threaded barrels. When you dispose these 10 frames you can change the SKU to 1911-PST-TB. Once this has been done, the SKU 1911-PST-TB will be available from the drop down for future dispositions. When an available SKU is selected, the Disposition Firearm Type and Disposition Description will be auto filled. This auto fill will only work if the SKU, Firearm Type, and Description are unique.
Example:
You define a SKU with the value of TEST, and its Firearm Type was Pistol, and the Description was This is a test pistol.
Later you select SKU TEST and then change its Firearm Type to Rifle, and the Description to This is a test rifle. The next time you select TEST as the SKU, Firearm Type and Description will not auto fill as the values are not unique to that SKU.
Complex Manufacturing allows for the Disposition Firearm Type to be changed from the Acquisition Firearm Type. Using the same example as above, the Acquisition Firearm Type was Frame, but it will now be changed to Pistol by selecting Pistol from the drop down. The Firearm Types used in FFL Tools have been defined by the ATF and are:
Pistol
Receiver
Revolver
Rifle
Shotgun
Combination Gun
Derringer
Destructive Device
Flare Gun
Frame
Machine Gun
Silencer
Tear Gas Launcher
Unknown Type
Any Other Weapon
Pistol Grip Firearm --- which is used for pistol grip only shotguns
The Disposition Description can also be changed from the Acquisition Description. Description is optional, and does not show on any of the bound book reports. It does show in the Inquiry Module and Scrap Report.
Using the example above, put Custom 1911 .45 ACP w/Threaded Barrel, and Rosewood Grips.
Once the selected firearms in the grid are disposed with SKU 1911-PST-TB, the next time this pistol is manufactured, all you will have to do is select 1911-PST-TB from the SKU drop down and Firearm Type and Description will be auto filled.
The Packing Slip # is optional but if supplied, it will be printed on the Firearm Transfer Report and saved in the database so you can look up which serial numbers where sent on which packing slip. If the items are being shipped, the tracking number for the shipment could be used.
If you have a DYMO LabelWriter connected and installed on the computer running FFL Tools, then you have the ability to print barcodes. Use the Options tab to setup which barcode design will print. To print barcodes for this disposition, click OFF to turn the switch ON.
When save is pressed, all selected serial numbers will be disposed. If the serial numbers are being disposed to self, then an acquisition will be created in your Retail Boundbook.
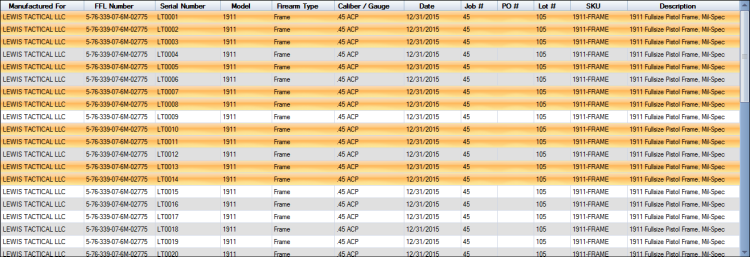
The image above shows serial numbers that have been selected for disposition in the above example. You can select serial numbers from the grid by Shift right Mouse Click to select a range or Ctrl right Mouse Click to select specific serial numbers.
If Manufactured For, Job Number, Purchase Order, or Lot Number radio buttons where used to filter the serial numbers in the data grid and no serial numbers are selected, when Save is clicked all serial numbers will be disposed without any warning.
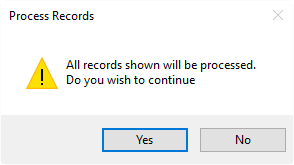
If All Firearms radio button is selected, an no serial numbers are selected in the grid, then the following warning will be displayed:
Click Yes to dispose all serial numbers, click No to allow for serial numbers to be selected from the data grid.